Overview
Kurt is a development board designed with an ESP32 module from Espressif that allows connection of any device used in DIY projects without needs for soldering by simply using the set of adapters provided with the board.
In the example you can see a demo project with standard devices and cables that includes:
- 2 push buttons
- PIR sensor
- oled display SSD1306
- 4 relay module
- WS2812b 5V led strip
Most important ... all devices are connected without any soldering.
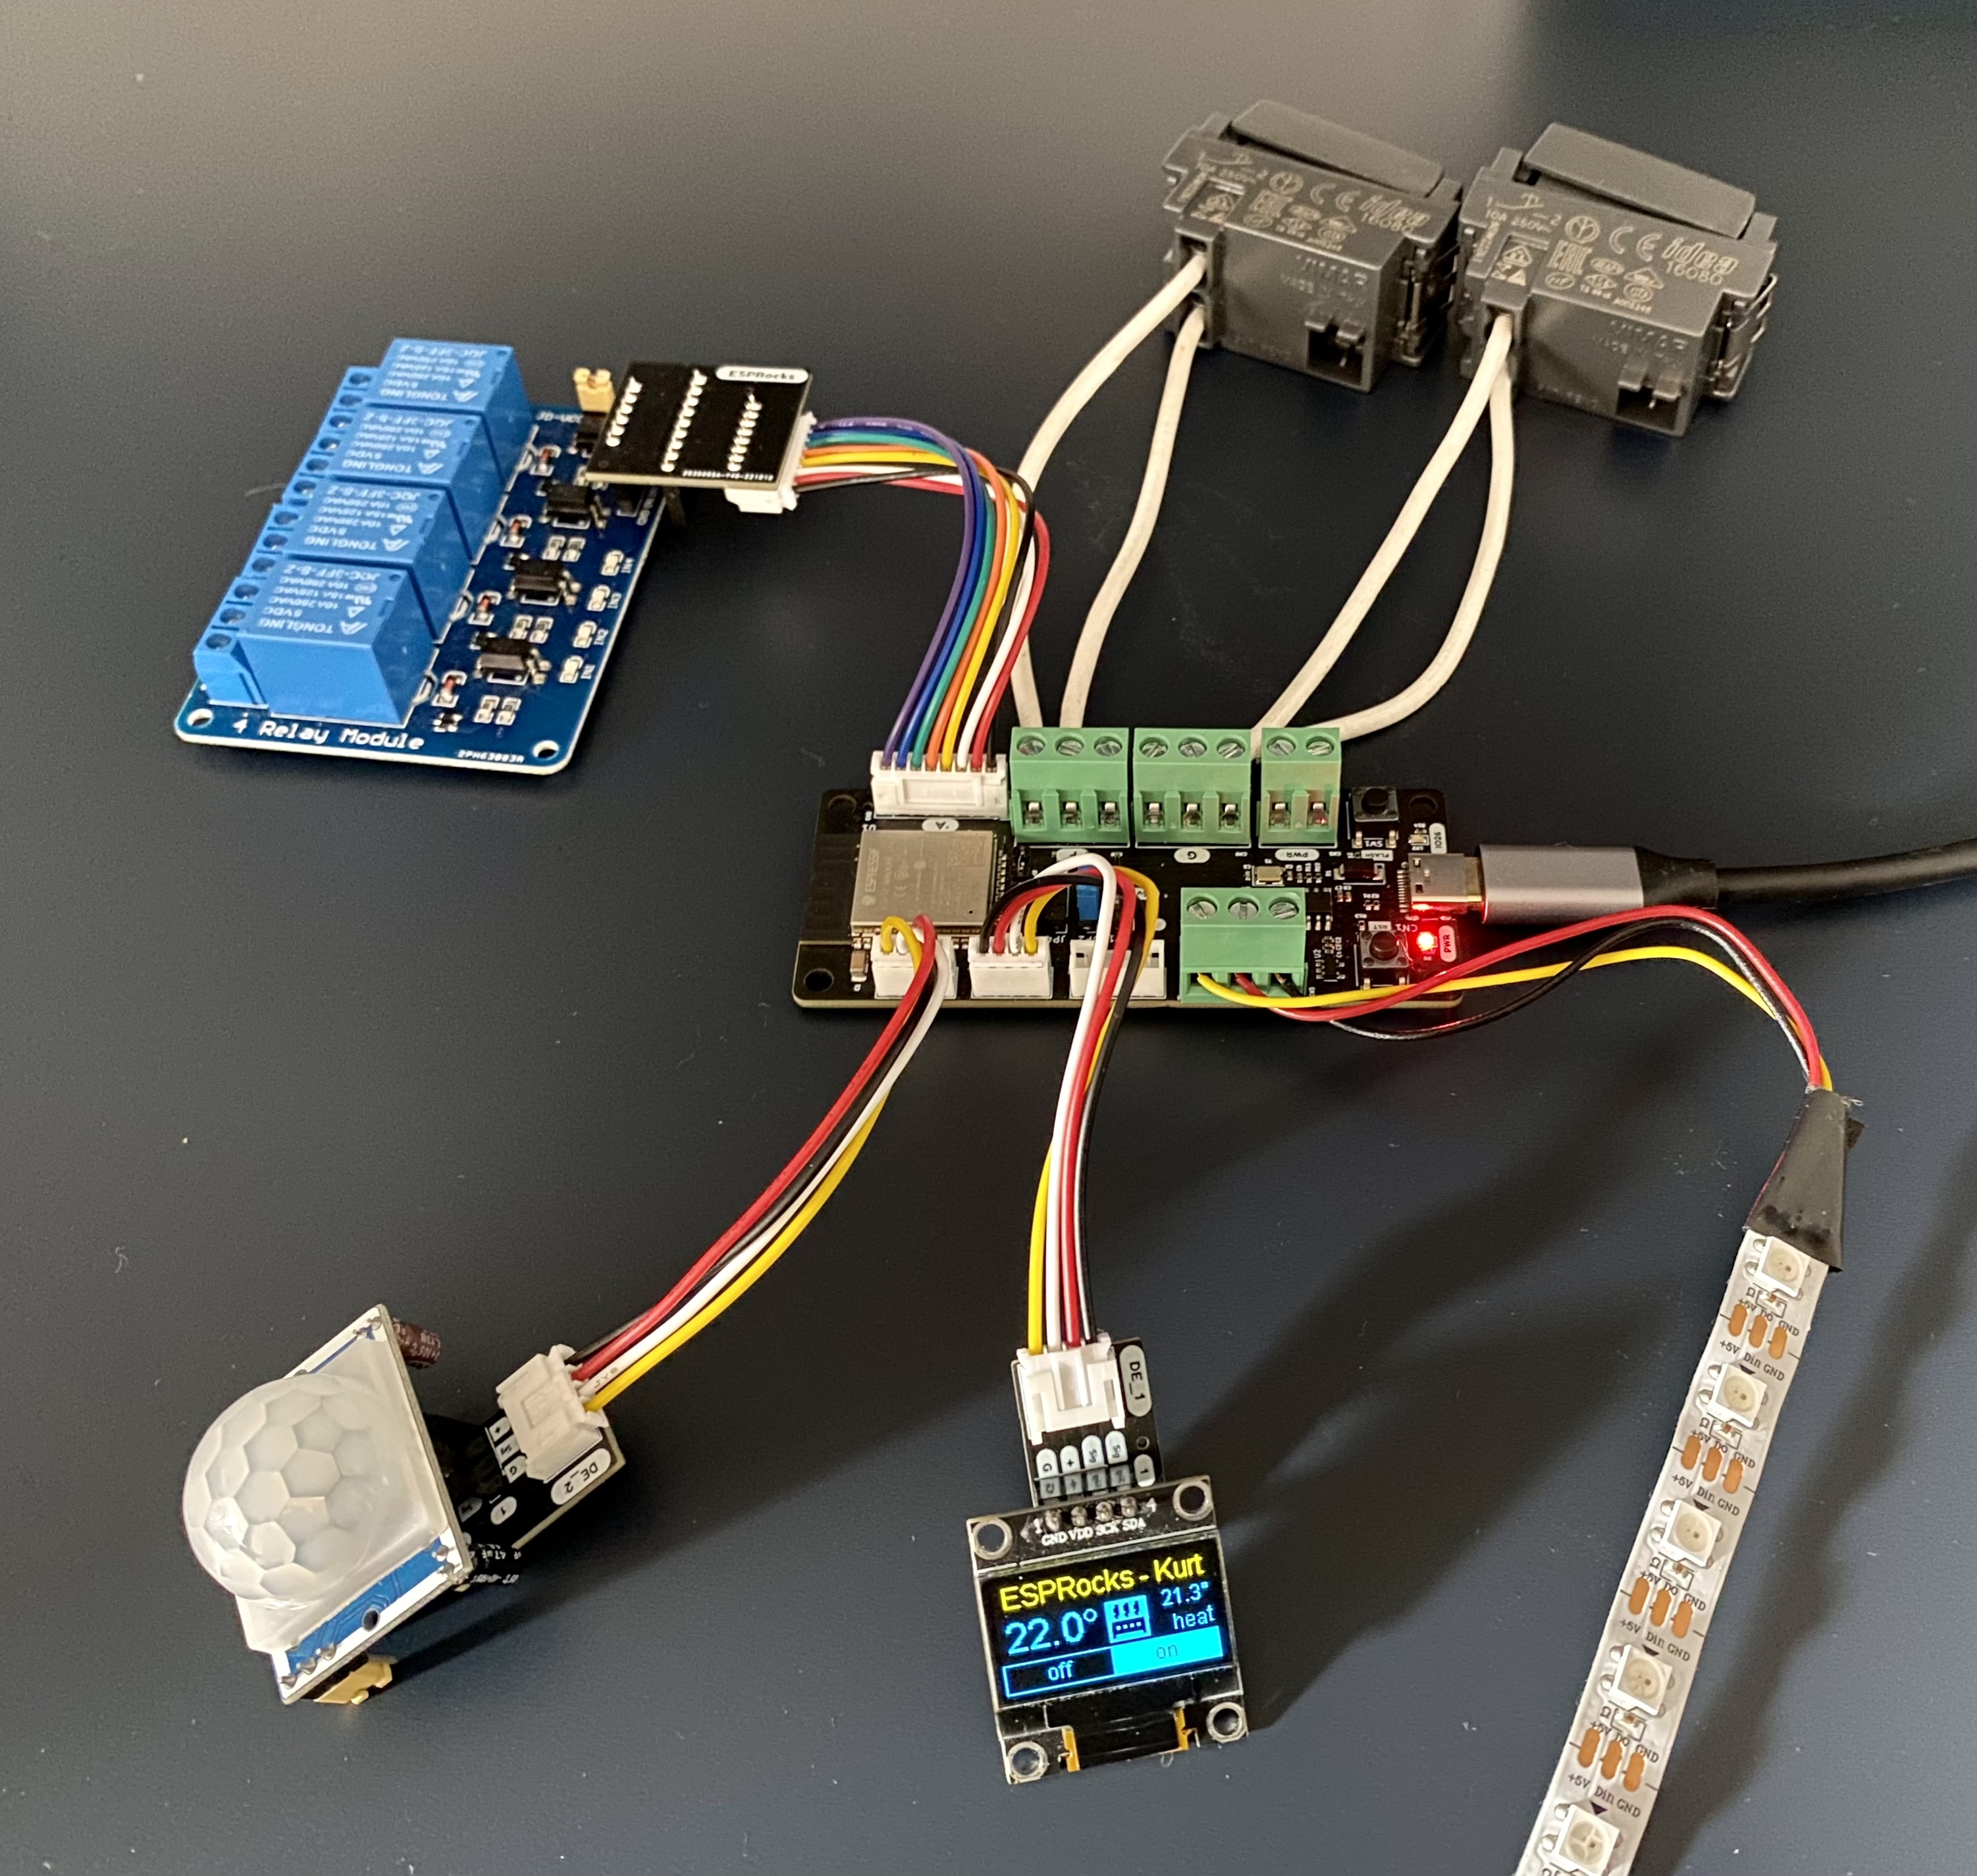
Demo project with Kurt - The ESP32 development board with flexible and reliable connection system
Included in the Kurt Kit
When you purchase Kurt, you will not only have the ESP32 development board but also the full setup to start your project:
- the ESP32 Kurt development board
- the 4 adapters to connect any device to your project
- a set of cables with JST PH2.0 connector
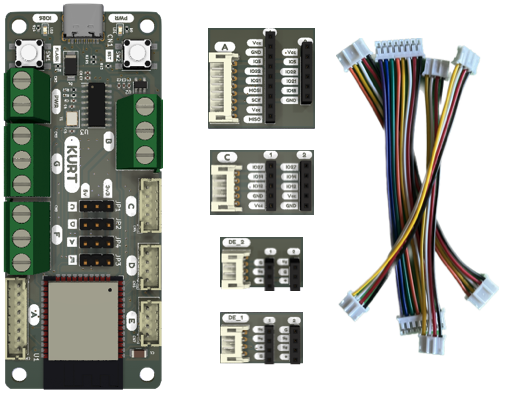
Kurt kit, including the ESP32 development board, all the adapters and cables needed to start
So, out of the box, you will be able to immediately start working on your project and control almost any DIY device available on the market, from relay boards, to displays, to sensors and more.
To check the devices compatible with each adapter take a look at the device table available in the technical documentation.
Advantages
The main advantages of using Kurt are:
- avoid any connection mistake
- stable connection, with no dupont cables
- no need for soldering connectors for your devices
- no need for soldering more cable to bring power supply to your devices
- selectable power supply (5V, 3.3V) fo your devices
- fast redesign of your project with plug&play devices
- fast code development with code snippets (available for EspHome)
- easy pinout reading on boards and adapters (no need to read datasheet)
- clean design of your project
Project setup
You can start setting up your project either by going to the Kurt Configurator page or by checking the table with compatible devices for each connector. The board and adapters pinout is available in the technical documentation.
Kurt configurator
Go to Kurt configurator page and follow these simple steps to get your setup done and all the details you need to program the Kurt board
- Select a connector from the connectors navigation bar to see all compatible devices
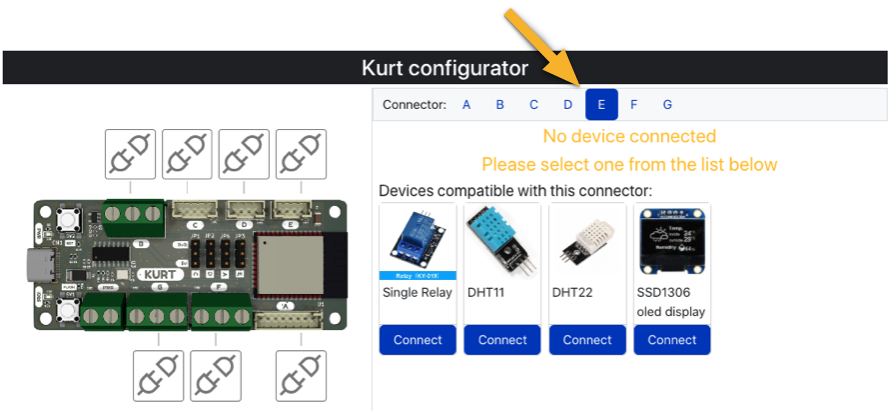
- Push "Connect" on the device you want for your project.
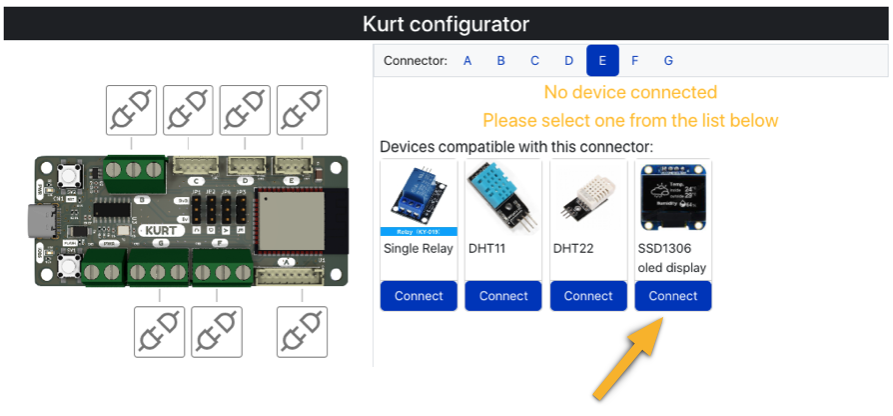
- Use the information provided for the selected devices to see:
- adapter to use
- connection details with pinout
- code snippet
Check also the Board drawing, to see the overall project configured with all the connected devices.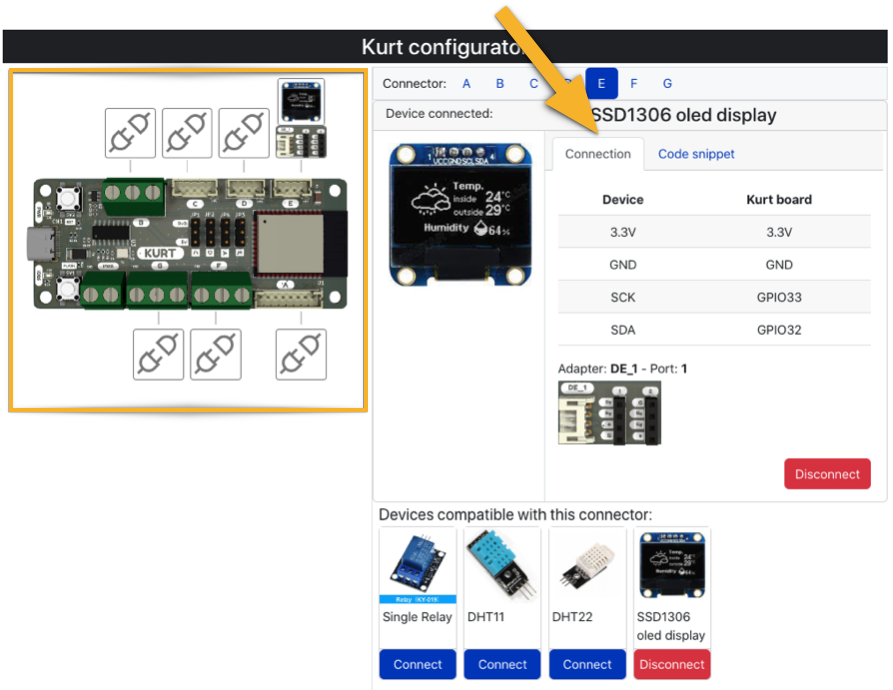
Device Table
Following you can find the table with all the devices tested with Kurt, including details about the adapters you need for the connection.
| Device | Adapter | |
|---|---|---|
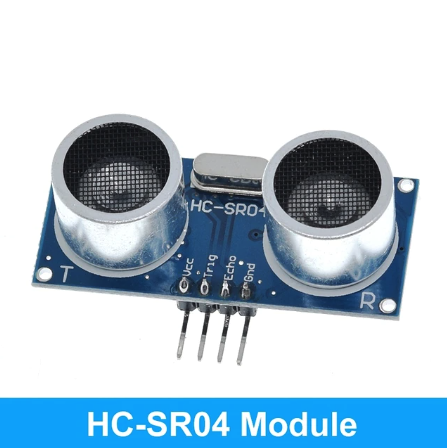 |
Radar | Adapter A |
| Adapter B | ||
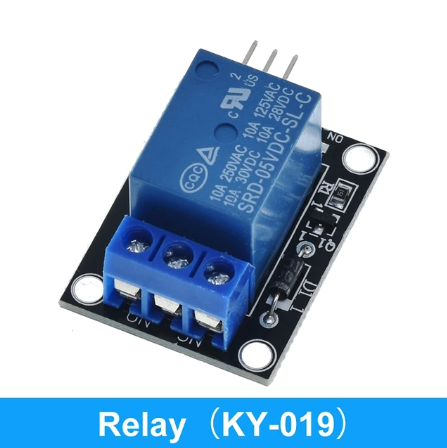 |
Single relay | Adapter A |
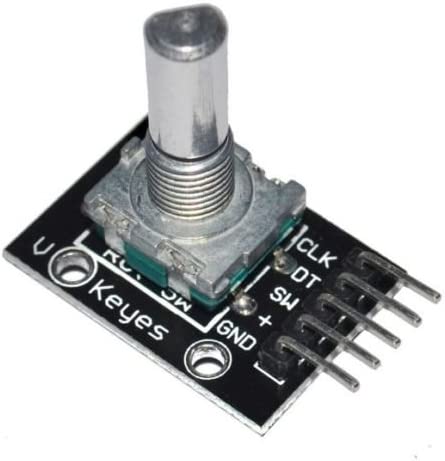 |
Rotary encoder | Adapter B |